Pixelate an Image Online
Use this image pixelator to pixelate a photo or illustration into adjustable square blocks. Set the grid width, tune the colors, and export a pixelated PNG or printable PDF in your browser.
Your pixel art starts here
Choose a photo or illustration. We’ll create an editable pixel version automatically.
Your image stays in this browser and is never uploaded.Or start with a sample
Choose a tool, then click or drag across the grid. Undo and redo shortcuts: Ctrl/Cmd+Z and Ctrl/Cmd+Shift+Z.
Export settings
Pick a pixelation example to try
See photos of animals, objects, and landscapes reduced to square color blocks. Choose one to load its source photo in the pixelator.
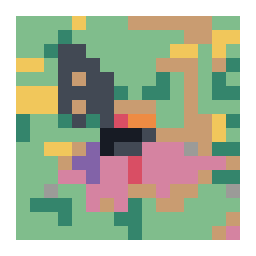
Monarch on a flower

Potted jade plant
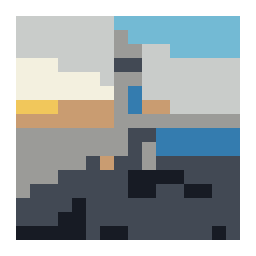
Lighthouse above the cliffs

Crescent moon over a lake
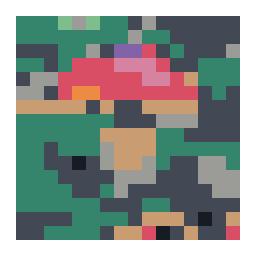
Rain-soaked forest mushroom
Old windmill in the fields
Snowy alpine peak

Orange tent at a campsite
Turquoise ceramic teapot
Rainbow over a meadow
Brass desk lamp
These starter designs are illustrative, not customer work. Choose one to load it in the editor, then adjust the grid and colors for your project.
Features
Explore what this workspace can do, how each control affects the result, and which export fits your next step.
Adjustable pixel block size
Grid width controls how many cells span the image. Lower widths combine more source detail into larger blocks; higher widths create smaller blocks and preserve narrower edges.
Preserved image proportions
The converted height follows the source image instead of forcing every result into a square. This keeps the subject shape intact while you experiment with the number of columns.
Solid color blocks by default
The pixelation preset starts with color blending off, which keeps neighboring cells visually separate. Advanced color treatment is available when a softer, more textured result suits the image.
Cell-level cleanup
Paint, erase, fill, pick a color, and undo or redo changes in the editable grid. You can correct a stray block or make a small region more consistent without restarting the conversion.
More than one way to save
Download a clean PNG for the pixelated artwork or a PDF with a grid and color key when you want a printed reference. Pattern options can show the cell structure and labels.
Browser-based image processing
Choose PNG, JPG, or WebP and process the image in the current browser page. The tool does not upload the source image or keep an account-based project library.
How to pixelate an image and control block size
Use grid width to decide how coarse the pixels should look, then compare the color treatment and make local edits before you download.
Load a photo or illustration
Select a PNG, JPG, or WebP file, or open one of the pixelation examples. A close, well-lit subject makes it easier to judge how block size changes the recognizable outline.
Set the pixel block size
Adjust grid width and compare the result at a few values. Fewer columns make each block larger and simplify details; more columns make smaller blocks and retain more edges.
Review the color treatment
Keep blending off for clean, flat color blocks. If the source contains gradients, compare the advanced color treatment and dithering choices, then return to the simpler look if texture obscures the subject.
Correct and download
Use Paint, Erase, Fill, or Pick if one cell needs attention. Save a clean PNG for the image or choose a PDF if the grid and color key will help you recreate the result.
What it means to pixelate an image
Pixelation reduces the number of visible image samples so neighboring parts of the original become larger blocks. In this editor, the result is represented as an editable grid: each cell receives a color, and the grid width determines how many cells cross the image. The height keeps the source proportions.
That makes the effect adjustable rather than a one-way blur. A coarse grid can simplify a photo into a few broad regions; a finer grid can keep more of the subject’s outline and small features. The output remains a cell-based image that you can edit and export.
Find a block size that keeps the subject recognizable
Start with a low grid width if you want a visibly chunky treatment. Increase it in steps when important details disappear, such as the edge of a face, the curve of a handle, or the boundary between two objects. The useful stopping point is the smallest grid that still communicates the subject you intended.
Compare the entire image at its final display size rather than judging only a zoomed-in editor view. A small detail that looks clear at high magnification may vanish in a thumbnail. Conversely, a little more grid width can make a logo or icon readable when viewed close up.
Choose a source that suits a block effect
A single subject against a simple background is often easier to interpret than a crowded scene. Strong light and dark boundaries help the grid keep the outline; an image with many tiny textures may turn into scattered blocks. Crop or simplify a copy of the image before loading it when the subject occupies only a small portion of the frame.
The converter maintains the source proportions, so a panoramic photo will remain wide. This is useful when you want to preserve the composition, but it means a wide image will have fewer rows than columns at the same width setting. Think about the intended dimensions before choosing a grid.
Keep colors flat or add controlled texture
The pixelation preset leaves color blending off initially, giving neighboring cells solid color regions. This suits a classic block treatment and makes a pattern easier to follow. If a smooth source gradient becomes banded, advanced color controls and dithering can introduce intermediate-looking texture with patterns of available colors.
Texture is a tradeoff. It can suggest a gradient with a limited palette, yet it may also make an already busy photograph harder to read. Compare the same grid with blending on and off, and use the version that preserves the subject’s important boundaries.
Use the editing grid for small corrections
After conversion, inspect the silhouette and the cells around high-contrast edges. Paint can change an individual cell, Fill can recolor a connected region, and Pick can reuse a color already present in the image. Erase removes a cell when you want an empty position. Undo and redo help you revise an edit.
These controls are for local cleanup, not a full drawing application. If the source framing or subject is wrong, adjust the source image and convert it again rather than repairing dozens of cells one at a time. Export a version before making a larger experimental change.
Choose a download for display or printing
A clean PNG shows the pixelated image without the chart overlay. A pattern PNG can include grid lines and cell labels, which are useful when you need to locate a coordinate. PDF export adds a printable grid and color key; a large design can be split across pages.
Before printing, review the page scale and check whether the cell labels remain legible. Before using a PNG in another composition, inspect the background setting and edges. The current project is not saved automatically, so download any version you intend to keep.
Keep image processing in context
The source image is processed in your browser and is not uploaded to this converter. That can be useful when you want to experiment without sending the image to a processing service. The tool does not create an account library or keep edits after you leave the session.
If the browser becomes slow with a very large source, resize a copy to a more manageable dimension and try again. This editor is designed to make a pixelated grid and reference files; it does not replace a general photo editor or preserve every photographic detail.
Image pixelation questions
How can I pixelate an image online?
Choose a PNG, JPG, or WebP file or load a sample. Adjust the grid width to control the block size, review the color treatment, then edit cells if needed. Download a clean PNG or printable PDF when the result is ready.
How do I make the pixels bigger?
Lower the grid width so fewer cells span the image. Each cell then covers more of the source, creating larger blocks. Increase the width again if the subject loses details that are important to the final image.
Will the tool crop my image into a square?
No. The generated grid follows the source image proportions. If you need a different crop or framing, prepare a cropped copy before loading it into the pixelator.
Can I keep colors as solid blocks?
Yes. The pixelation preset starts with color blending turned off, so neighboring cells remain flat blocks. Advanced color options can add texture when you want a softer treatment for gradients.
Can I edit the pixelated result?
Yes. Paint, erase, fill connected cells, or pick a color from the grid. Undo and redo are available during the session, so you can correct a small edge without starting over.
Can I pixelate a photo and download it without a grid?
Yes. Choose the clean PNG export to save the pixelated artwork without chart lines. Use the pattern PNG or PDF when visible cells, labels, or a color key will help you follow the image.
Can a pixelated image have a transparent background?
The editor supports transparent PNG output and background removal for suitable images. A simple, clearly separated background is easier to remove; inspect the outline for leftover pixels before using the export.
Does pixelating an image upload it?
No. The current converter processes the source in your browser and does not upload it to the tool. It also does not save the project for a later session, so download the result before leaving.
What is a good image for pixelation?
Try a subject with a clear outline, good contrast, and limited background clutter. If a detailed photo turns into noise, use a closer crop, a larger grid width, or a simpler source image.
Can I print a pixelated image as a chart?
Yes. The PDF includes a grid and color key for printing. Review the page scale and label size first, especially when the design is large enough to span multiple pages.